
We take blocks of Expanded Polystyrene
Styrofoam (EPS), which are then cut into panels by one of three (3) manufacturing plants.
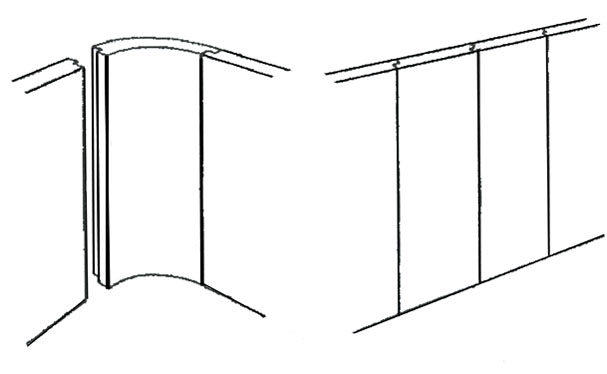
The panels are delivered within the blocks, so the builder just pulls the panels out of the foam
blocks and puts them together. The foam blocks act as more or less of a crate and protect
them from damage during transport. The wall panels are numbered and notched to help
assembly and can be put together in the excavated site in just a few hours.
INTERLOCKING WALL PANELS 
 To utilize these panels in the construction of a swimming pool, a hole
is excavated for the pool. The excavation area is a little larger than the pool so that both
sides of the thermal-foam panel can be plastered making the EPS panels a sandwich structural insulated
wall (SIPS) capable of supporting the backfill around the pool.
To utilize these panels in the construction of a swimming pool, a hole
is excavated for the pool. The excavation area is a little larger than the pool so that both
sides of the thermal-foam panel can be plastered making the EPS panels a sandwich structural insulated
wall (SIPS) capable of supporting the backfill around the pool.
AB/road base or sand is compacted in the base of this excavation.
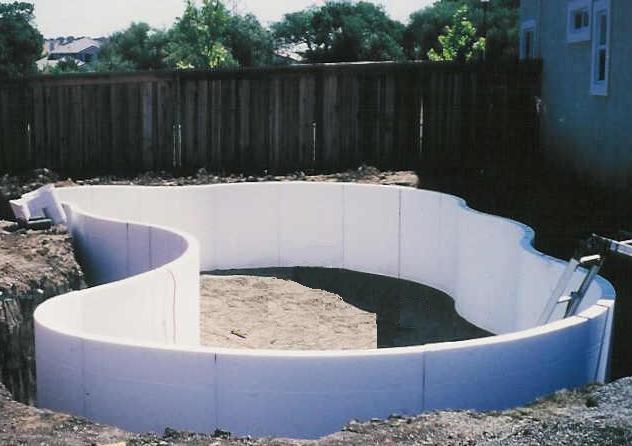
Our pre-cut panels are glued with a standard foam adhesive (such as Dow Ener-Bonder) and stood
in the prepared excavation area to complete the desired shape of your pool. The assembly is very
quick and easy. Additionally, you will use panels to construct the steps, benches or swim-outs.
 Plaster the panels on both sides with two (2) thin coats of our custom design structural plaster with
a polypropylene mesh embedded between the coats. Most of the materials used for the structural
plaster can be purchased from any local home building supply store.
Plaster the panels on both sides with two (2) thin coats of our custom design structural plaster with
a polypropylene mesh embedded between the coats. Most of the materials used for the structural
plaster can be purchased from any local home building supply store.
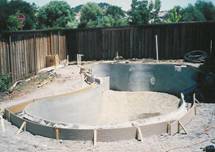
Apply the two (2) thin coats of plaster or rendering over the foam wall panels by conventional hand-trowel
methods or it can be sprayed-on with a hopper or spray gun. The area behind the pool wall is filled with
self-compacting pea-gravel or any other suitable compactable backfill.
After the curing process, the next stage is setting up the floor by grading the AB base or sand to the
desired shape and depth of the bottom, and before backfilling of the over-dig area, you need to install 4"
more of compactable fill against the inside bottom 4" of the pool wall, which will stabilize the bottom of
the wall system so that you can backfill.
| Then before pouring a 4" concrete floor you can install the insulation barrier, a green building insulator.
|
|
This underground insulation material is an all-in-one subsurface barrier of extruded expanded flexible recycled
polystyrene foam XPS). |
|
The floor insulation barrier is a 100% vapor,
water, and moisture barrier as well as a thermal break of conductive heat transfer and highly recommended
in colder climates. (This insulation can be used as a 4' frost barrier around the pool structure
where frost might occur 4' deep.)
|
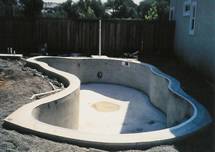
The next step is to pour the concrete for the floor, the pool ringbeam around the top of the pool and the
equipment pad. A coping and/or decking is then installed over the ringbeam, the concrete deck around
the pool is poured and then an interior finish can be applied.
We offer and recommend the Elastameric Variable Membrane (EVM) Coating (rolled-on and/or sprayed-on)
for finishing the interior of the pool. There are other types of finishes you can use (such as composite fiberglass,
epoxy or vinyl coatings, or a pre-fabricated vinyl liners), however they are supplied by other manufacturers.

Whether you finish the pool with our coating or one of the other interior finishes, the floor of the pool needs to be
poured with concrete.
After the pool has been built and your coping is installed on top of the bond beam (or ring-beam around the pool),
you will want to used Deck-O-Foam as an expansion joint filler between the coping and the
concrete decking. Deck-O-Foam is supplied with a convenient, pre-scored removable strip to provide a uniform sealing reservoir in
the joint.
Deck-O-Seal is used for caulking and sealing joints subject to concrete movement to provide a firm,
flexible, weather-tight seal and is ideal for sealing joints on swimming pool decks. We usually sprinkle sand in
the Deck-O-Seal afterwards to give it an appearance of a grout joint and to take the shine off the sealant.
The entire construction process takes about thirty days or less with the installation of the pool equipment, etc.
See Engineering page for pool wall section, step section and spa section engineered drawings.
|